Introduction:
Welcome to the world of Drying Mat Care 101, where we delve into the art of preserving your kitchen’s unsung hero. In this article, we’ll explore advanced techniques and in-depth insights on how to maintain and care for your drying mat. Our guide is none other than the renowned cleaning expert, Jolie Kerr, who brings a wealth of experience and expertise to help you keep this kitchen essential in pristine condition. Before we embark on our journey into the intricacies of drying mat care, let’s introduce our guide, Jolie Kerr. With a decade of experience in the world of cleaning and homemaking, Jolie Kerr is a trusted authority in the field. Her insightful advice and practical tips have graced the pages of numerous publications and earned her a dedicated following. Now, she’s here to share her wisdom with you.
Drying Mat
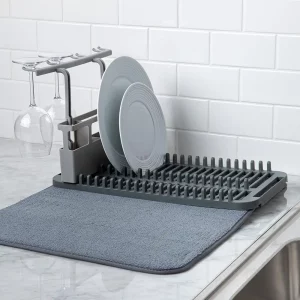
Your drying mat is more than just a humble kitchen accessory; it plays a crucial role in ensuring your dishes are clean, dry, and ready to be put away. Jolie Kerr begins by explaining the significance of this kitchen essential and introduces you to the different types of drying mats available, helping you make an informed choice. Drying mats come in various shapes and sizes, but they all share a common purpose: to provide a clean, dry surface for your dishes to air dry after washing. These mats are a versatile alternative to traditional dish racks, as they can be easily folded or rolled up when not in use, saving precious counter space. When selecting a drying mat, consider the size that suits your needs. A larger mat can accommodate more dishes, while a smaller one might be perfect for a quick wash. Additionally, choose a mat with a non-slip surface to prevent accidents in the kitchen.
Cleaning Techniques
Shake Off Excess Water: After using your drying mat, shake off any excess water or food particles into the sink or trash.
Rinse with Warm Water: Rinse the mat with warm water to remove any remaining residue.
Use Mild Soap: Apply a mild dish soap or a mixture of water and vinegar to a sponge or cloth. Gently scrub the mat’s surface.
Rinse Thoroughly: Rinse the mat again with warm water to ensure all soap is removed.
Dry Properly: Allow the mat to air dry fully before storing it away.
Maintenance
- Proper Drying: After each use, ensure the mat is completely dry before storing it. Hanging it up or using a mat with a quick-drying surface can help.
- Ventilation: Allow air to circulate around the mat by not stacking other items on top of it when it’s stored.
- Regular Cleaning: As mentioned earlier, regular cleaning prevents mold and mildew from developing.
- Spot Clean: For minor stains, use a mixture of baking soda and water. Apply it to the stained area and gently scrub. Rinse thoroughly.
- Persistent Stains: For more stubborn stains, consider using a stain remover, but always test it in an inconspicuous area first.
- Odor Control: If your mat starts to develop odors, you can soak it in a mixture of water and vinegar for a few hours. Rinse and dry as usual.
Material Matters
Microfiber Drying Mats: These mats are highly absorbent and quick drying, making them an excellent choice for busy kitchens. To maintain a microfiber mat, simply toss it in the washing machine with a low heat setting.
Silicone Drying Mats: Silicone mats are heat-resistant and offer a non-slip surface for your dishes. Cleaning them is a breeze as they are dishwasher safe.
Dish Cloth Drying Mats: Traditional dish cloth mats are versatile and easy to clean. You’ll need to wash them frequently to keep them hygienic.
Cork Drying Mats: Cork mats are not only eco-friendly but also stylish. To care for them, hand wash and allow them to air dry to maintain their natural properties.

Storage Tips.
Air Dry Before Storing: Ensure your drying mat is completely dry before storing it to prevent mold and odors.
Use a Rack: Invest in a dish rack or mat rack to keep your mat elevated and allow air to circulate.
Roll It Up: If you have a flexible silicone mat, you can roll it up for compact storage.
Hang It: Hanging your mat on a hook is an excellent space-saving solution in small kitchens.
Clean Storage Space: Ensure the area where you store your mat is clean and free from any food debris.
KeyPoint:
| Material | Features | Maintenance |
|---|---|---|
| Microfiber | Absorbent, quick-drying | Machine washable, low heat |
| Silicone | Heat-resistant, non-slip | Dishwasher safe |
| Dish Cloth | Traditional, versatile | Frequent washing |
| Cork | Eco-friendly, stylish | Hand wash, air dry |
Beyond the Basics
- Immediate Action: Act quickly by blotting the spill with a clean cloth or paper towels.
- Stain Removers: For stubborn stains, you can use a stain remover, but always test it in an inconspicuous area first.
- Rotate Use: If you have multiple mats, rotate their use to prevent excessive wear on one mat.
- Replace When Necessary: If you notice signs of wear, like cracks or a loss of non-slip properties, it’s time to replace your mat.
Conclusion:
As we conclude our journey through Drying Mat Care 101, Jolie Kerr shares her final thoughts and words of wisdom to help you master the art of keeping your kitchen essential in pristine condition. Jolie Kerr’s expertise in the field of cleaning and homemaking has provided you with valuable insights and advanced techniques for maintaining your drying mat. With her guidance, you’re now equipped to say goodbye to soggy, smelly mats and hello to a fresh, clean, and pristine kitchen essential. Start your journey to drying mat mastery today! a well-cared-for drying mat not only keeps your kitchen looking neat but also ensures your dishes remain clean and hygienic. By following the expert advice of Jolie Kerr, you can enjoy the benefits of a pristine and functional drying mat for years.