A Complete Guide to HDR on Windows 11
Have you ever wanted to take your Windows PC’s visual experience to the next level? One effective way to achieve this is by enabling HDR (High Dynamic Range). In this comprehensive guide, we’ll delve into the world of HDR, explaining what it is and how you can enable it on your Windows 11 system. Moreover, we’ll troubleshoot common HDR issues, ensuring that your display quality remains top-notch.
What Is HDR?
HDR, or High Dynamic Range, has revolutionized the way we perceive images and videos. It brings a level of detail and realism that Standard Dynamic Range (SDR) simply can’t match. HDR-enabled monitors excel at displaying intricate details in both the darkest and brightest areas of an image, providing an unparalleled viewing experience.
HDR achieves this by using a higher bit depth to produce a wider range of colors and increasing peak brightness for more vivid highlights. While initially popular among photographers, HDR has now expanded its reach to movies, videos, and even gaming.
How to Check if Your Computer Supports HDR
Before diving into HDR, it’s crucial to ensure your monitor supports this feature. Here’s how to check:
- Press Win + I to open the Settings app.
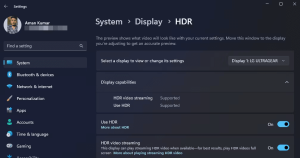
- Select “System” on the left sidebar and then “Display” on the right pane.
- Click “Use HDR.”
- Next to “Display capabilities,” check if it says “Supported” for both HDR video streaming and Use HDR. If it does, your display supports HDR.
Now that you’ve confirmed your monitor’s compatibility, let’s explore how to enable HDR effectively.
1. Enable HDR Using the Xbox Game Bar
The Xbox Game Bar is a versatile tool that allows you to access various features while gaming, including enabling HDR. Follow these steps:
- Press Win to open the Start Menu.
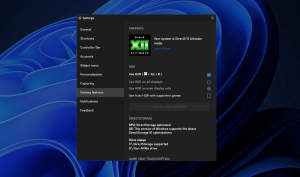
- Type “Xbox Game Bar” and press Enter or use Win + G.
- Click the gear icon at the top.
- Select “Gaming features” from the left sidebar.
- Check the “Use HDR” box.
If you have multiple displays, you can choose to use HDR on all displays or just the main one. You can also enable “Auto HDR” for supported games, which automatically activates HDR when you play them.
2. Enable HDR Using the Settings App
Another straightforward method to activate HDR on Windows 11 is through the Settings app:
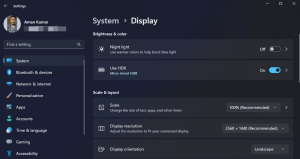
- Launch the Settings app.
- Choose “System” from the left sidebar and then “Display” from the right pane.
- Enable the toggle next to “Use HDR.”
Additionally, you can activate “Auto HDR” to enhance the picture quality of eligible games.
Why Is HDR Not Working on Windows 11?
Even after enabling HDR, you might encounter situations where it doesn’t work as expected. Here are common reasons and solutions:
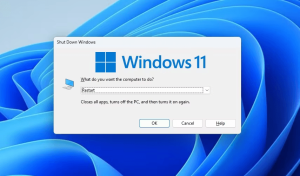
- Restart Your Computer: A simple restart can resolve temporary bugs or glitches affecting HDR. Press Alt + F4, choose “Restart,” and check if HDR works after the reboot.
Image by https://www.makeuseof.com/ - Compatibility Issues: HDR requires HDMI 2.0 or DisplayPort 1.4 cables and HDR10 support on your monitor. Ensure your hardware meets these requirements for HDR to function correctly.
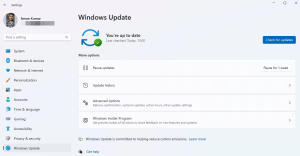
- Update Your Graphics Driver: Regularly updating your graphics driver is essential. Use the Settings app to check for updates or visit your graphics driver manufacturer’s website for the latest drivers.
Image by https://www.makeuseof.com/ - Uninstall Recent Windows Updates: If HDR issues arose after a Windows update, uninstall the problematic update. Refer to our guide on manually uninstalling Windows updates for assistance.
Everything You Need to Know About HDR on Windows
In summary, HDR elevates your Windows PC’s visual experience, offering more detail in both dark and light areas of images. This guide has provided you with comprehensive instructions on enabling HDR and troubleshooting potential issues. By following these steps, you can ensure that your HDR experience on Windows 11 is nothing short of spectacular.


