Introduction: Fixing Steam Library Folder
The “Steam Library Folder Not Writable” error can be frustrating for gamers, preventing them from installing or updating games through the Steam client on Windows 11. However, fret not, as we’ve compiled a comprehensive guide to help you resolve this issue and get back to enjoying your favorite games hassle-free.
Methods to Fix the “Steam Library Folder Not Writable” Error:
If you’ve encountered the pesky “Steam library folder not writable” error, follow these methods to address the issue and regain the ability to install and update games on Steam.
1. Change Steam Folder Attributes:
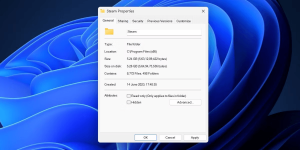
Steam requires both read and write permissions to function properly. If the steamapps folder is set to “read-only,” this error can occur. To resolve it:
Open File Explorer using Win + E.
Navigate to C:\Program Files (x86) and open the Steam folder.
Right-click on the steamapps folder, select Properties, and uncheck Read-only in the Attributes section.
Apply the changes and relaunch Steam.
2. Run Steam App with Administrator Privileges:
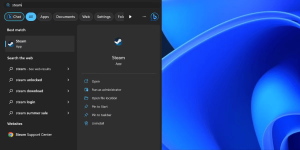
Lack of administrative privileges can cause issues with Steam. To rectify this:
Open Task Manager with Ctrl + Shift + Esc.
End the Steam process.
Search for “Steam,” right-click, and choose Run as administrator.
Confirm the User Account Control prompt.
3. Grant Full Ownership of the Steam Folder:
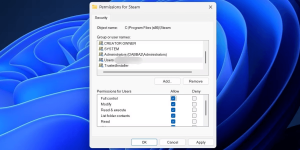
Complete ownership of the Steam folder is crucial. Here’s how to achieve it:
Open File Explorer and navigate to C:\Program Files (x86).
Right-click the Steam folder, open Properties, and switch to the Security tab.
Edit permissions, grant Full Control to your user profile, and apply changes.
4. Repair the Steam Library Folder:
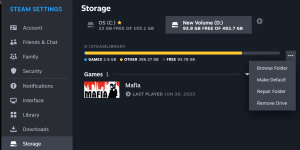
Steam offers a repair option for its library folders:
Open Steam and access Settings.
Navigate to Storage and choose the Repair folder option after clicking the ellipsis icon.
Confirm the User Account Control prompt.
5. Re-Add the Steam Library Folder:
If the error persists, remove and re-add the Steam library folder:
Open Steam, go to Settings, and access Storage.
Remove a Steam library folder and add it again with the correct location.

6. Flush the Steam Download Cache:
Outdated or corrupt download caches can cause issues. Clear the cache:
Open Steam’s settings and choose Downloads.
Click Clear Download Cache and confirm the action.
7. Run a Check Disk Scan:
Use the Check Disk utility to scan and repair hard disk errors that might hinder Steam’s file manipulation.
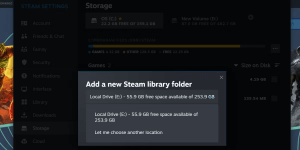
8. Reinstall the Game on Another Drive:
If installation issues persist on the C drive, try a different drive:
Add a new drive in Steam’s Storage settings and install the game there.
9. Format the Disk and Try Again:
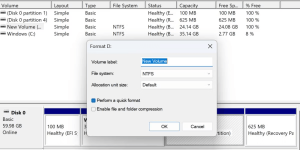
For new disk drives causing the error, assign a new drive letter and format the disk:
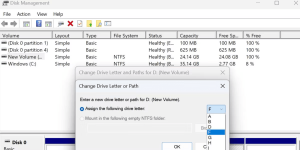
Use the Disk Management utility to change the drive letter and format the disk.
Conclusion:
The “Steam library folder not writable” error can be easily tackled using these methods. Whether it’s adjusting folder attributes, granting permissions, or troubleshooting through repairs and cache flushes, you can enjoy your gaming experience on Steam without hindrance. Follow these steps to make your Steam library folder writable again on Windows 11 and get back to gaming without interruption.


