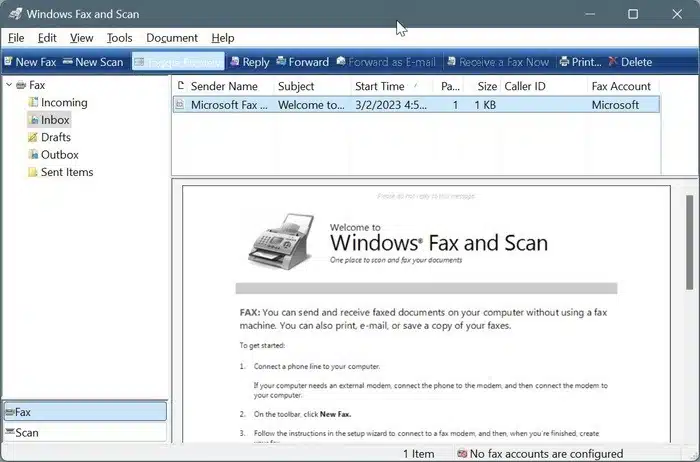
Introduction: Install Windows Fax and scan
For a considerable duration, the Windows operating system has featured the utility known as Windows Fax and scan, Unfortunately, it is not one of the default features anymore in Windows 11. In contrast, the Scan app is included in Windows 11, giving similar capabilities. However, if you still prefer the classic Windows Fax and Scan tool. It’s great news that that you have the choice of installing it as an elective feature within the Windows 11 environment. Throughout this instructional manual, we’ll explain how to install Windows Fax in a detailed manner on your computer operating with Windows 11.
Why Windows Fax and scan is not included in Windows 11:
Windows 11 incorporates diverse improvements and revisions, and to optimize the operating system, certain outdated features might have been substituted or eliminated. Replacing Windows Fax is the new Scan app, offering alike capabilities, and the need for faxing has diminished over time.
Installing Windows Fax and scan in Windows 11:
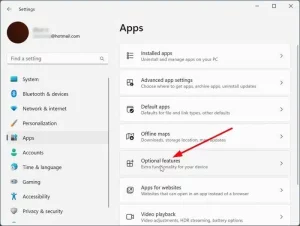
Step 1: Access the Windows 11 Settings > Apps > Optional features page. Open the Windows Settings by clicking on the Start button and selecting the gear-shaped Settings icon. To access “Apps”, simply go to the left-hand side of the Settings window and click Next, pick “Optional features” from among the available Apps choices.
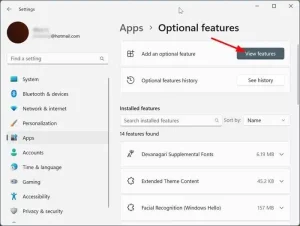
Step 2: Click on “View features” “Add an optional feature” should be right next to it Click on the “View features” button found next to “Add an optional feature” on the Optional features page. Once completed, a selection of extra features that are available for installation will be presented for your viewing and choosing.
Step 3: Scroll down to find “Windows Fax and select the checkbox. In the list of optional features, scroll down until you find “Windows Fax.”
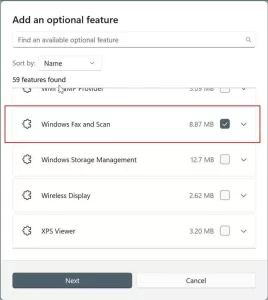
Upon locating it, mark the checkbox adjacent to it to select it for installation.
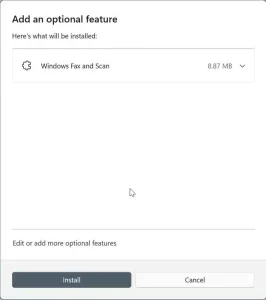
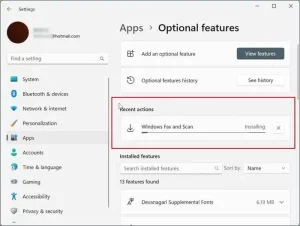
Step 4: Click “Next” and then “Install” to install Windows Fax: After deciding upon ‘Windows Fax and Scan’, proceed forward with a mouse-click over ‘Next’. Begin the installation process by clicking on “Install”. The installation of the feature in Windows 11 will be completed within minutes, By visiting the Optional features page, you can easily monitor its progress.
Coexistence with the Scan app:
A noteworthy point is that the Windows Fax application has compatibility with the Scan tool. Uninstalling the Scan app is not necessary for utilizing Windows Fax and Scan. You can choose between the two available applications. can fulfill your scanning needs.
Uninstalling Windows Fax and Scan (optional):
In case you determine that you don’t require Windows Fax anymore, it can be uninstalled from the Optional features page. Simply navigate back to Settings > Apps > Optional features, find “Windows Fax and Scan,” and click on “Uninstall.”
Conclusion:
Despite not being included by default in Windows 11,, installing it as a choice is simple. By implementing the measures detailed in this tutorial, you can have both Windows Fax and Scan and the Scan app available on your Windows 11 system. Your scanning tasks will be accompanied by flexibility and a range of choices.

