An Overview of Task Scheduler Specifically for Windows 10
Windows 10 includes an effective utility called Task Scheduler enabling users to automate different types of tasks. Whilst the system and certain applications employ it for tasks such as disk maintenance and updating, anyone can utilize it to automate custom actions. By utilizing Task Scheduler, running programs, executing scripts, and performing commands can be scheduled for precise time intervals or triggered based on specific events.
Easy Instructions for Setting up a Basic Task leveraging the functionality of Task Scheduler
1 Access the Start menu and search for “Task Schedulers.” Choose the top result to open the app.
2 Right-click the “Task Scheduler Library” branch and choose “New Folder.” You can name it something like “MyTasks” to keep your tasks organized.
3 Expand the “Task Scheduler Library” branch, Choose the recently made folder named “MyTasks”., Finally, click on the Action menu to proceed.
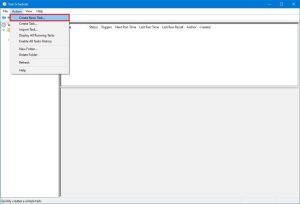
4 Choose “Create Basic Task.”
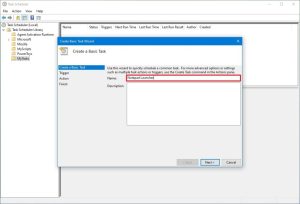
5 In the “Name” field, provide a descriptive name for the task, e.g., “Notepad Launcher.”
6 Optionally, add a description for the task in the “Description” field.
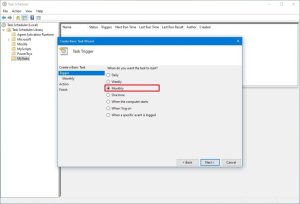
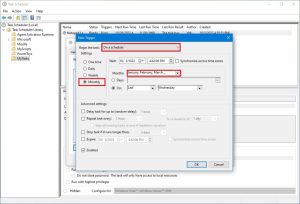
7 After clicking on “Next”, choose the option named “Monthly” as the trigger.
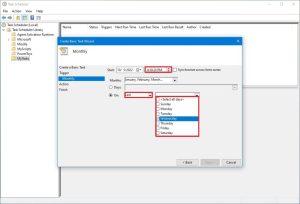
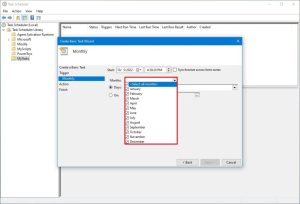
8 Set the desired schedule using the “Start” settings, specifying the months and days the task should run.
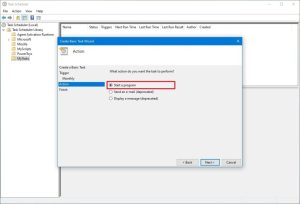
9 Pick the “Run a program” alternative, specify the application’s path, supply any needed inputs or options.

10 Select “Finish” in order to save the task.
How to Create an Advanced Task utilizing the Task Scheduler tool
Open the Start menu and search for “Task Scheduler.” Click on the top result to ‘Task Scheduler,’ access its interface..
Duplicate the procedures used in the basic task establishment for producing a fresh directory named “MyTasks” beneath “Task Scheduler Library” and choose it.
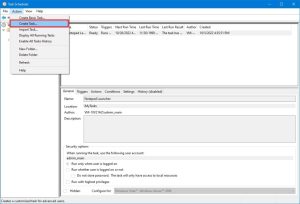
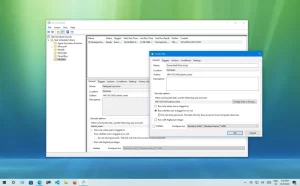
Access the Action menu and select followed by selecting “Create Task.”
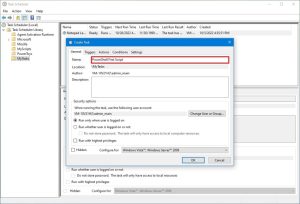
In the “Name” field, provide a short descriptive name for the task, e.g., “PowerShell First Script.”
Optionally, add a description for the task.
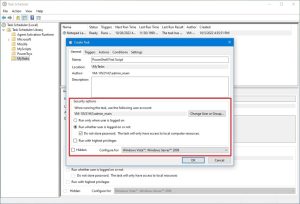
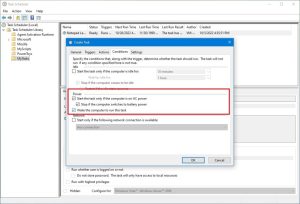
Within the “Security options” category, configure which administrator account can run the task.
If needed, toggle the “Run with highest privileges” checkbox as well. if needed.
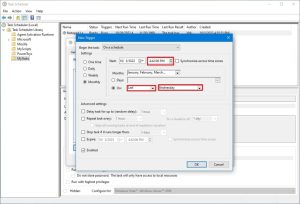
Click on the “Triggers” tab and select the desired trigger, such as “On a schedule.”
Assign a start time and establish a recurring schedule for task execution.
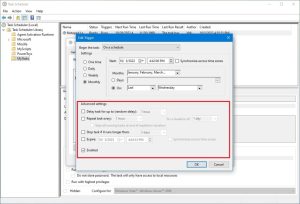
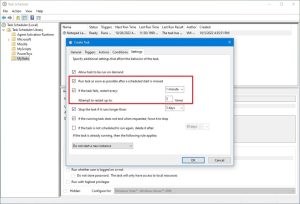
Configure other settings as required in the “Advanced configurations” section should be adjusted according to your requirements too..
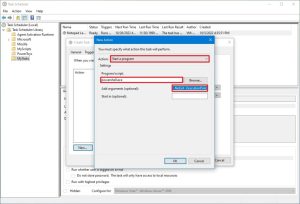
Access the “Action” tab and, opt for “Execute a program”, finally, indicate where to find the application.
Optionally, add arguments in the “Add arguments” field if necessary.
Select “OK” to save the task.
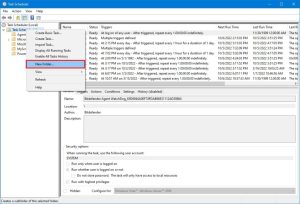
Methods for Running, Editing, and Erasing Tasks on the Task Scheduler
To view, run, edit, or delete a task, open the Start menu and search for “Task Scheduler.” ‘App’ needs launching/opening/starting/commencing/take-off/executing/enforcement/pushing of Task Schedule program.
Expand the “Task Scheduler Library” branch and select the folder containing your tasks.
Right-click on a task to run it on demand, edit its properties, or delete it.
Instead, utilize the Actions pane on the right to carry out diverse actions on the chosen task.
Using Task Scheduler, task automation and seamless management are achievable, enhancing your efficiency on Window 10.