Introduction to Network Troubleshooting on macOS:
macOS offers a robust networking experience, but occasional issues can arise, affecting internet connectivity and overall performance. In this guide, we’ll explore essential tips for troubleshooting network problems on macOS, helping you resolve connectivity issues and enjoy a seamless online experience.
Checking Telebroad Servers Status:
Before diving into network troubleshooting, it’s essential to ensure that the Telebroad servers you are using are operational. Check the status of Telebroad PBXCELLENT or Telebroad HyperT1 systems to rule out any server-related issues that might be causing disruptions in your network.
General Troubleshooting Suggestions:
When facing network problems, try these general troubleshooting suggestions:
- Restarting your Device and Safe Mode: Clear any software or hardware conflicts and establish fresh network connections by restarting your Mac. If the issue persists, restart your device in Safe Mode to identify potential conflicts caused by third-party apps.
- Refreshing Wi-Fi Connection and Restarting Wi-Fi Networks: Refresh your Wi-Fi connection by toggling it off and on. Prioritize Wi-Fi networks based on speed and stability. If issues persist, forget and reconnect to specific Wi-Fi networks to resolve connectivity problems.
- Invisible Wi-Fi Networks: If your Wi-Fi network is invisible, it might be due to the router’s broadcast feature being disabled for added security. Obtain the network’s SSID, password, and security type from the administrator to connect to an invisible network.
- Router/Modem Side Troubleshooting: Test internet connectivity with different devices to identify whether the problem lies with your specific device or the network. Restart your router/modem or make necessary changes to optimize Wi-Fi performance.
The Wireless Diagnostics App:
macOS provides the Wireless Diagnostics app to diagnose Wi-Fi issues and offer troubleshooting suggestions.
- Automatic Diagnostics: Run automatic wireless diagnostics on your Wi-Fi connection by holding the Option key and clicking the Wi-Fi icon on the menu bar. The app will provide possible causes and suggestions for resolving network issues.
- Additional Diagnostics Tools: The Wireless Diagnostics app offers useful tools, including Wi-Fi network scanning, real-time performance visualization, and Wi-Fi traffic analysis, to aid in network troubleshooting.
Restarting Network Connections:
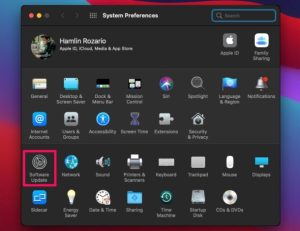
Restarting network connections can help resolve connectivity problems. Access the network preferences screen to view the status of your connections.
- Network Preferences Access and Statuses: Access the network preferences screen to view the statuses of your active and configured networks. Green indicates an active connected network, yellow indicates an active network not connected, and red indicates an unavailable or unconfigured network.
- Restarting a Network Connection: Restart a network connection by removing and adding it back or by temporarily disabling and reactivating it.
- Restarting all Network Connections with a New Location: Create a new network location to restart all available configured networks, helpful for troubleshooting and adjusting network settings.
Changing the Priority of Connections and Wi-Fi Networks:
Prioritize network connections and Wi-Fi networks to maximize performance and stability.
- Changing Connections Priority: Reorder network connections to give priority to the best-performing connection. Use Set Service Order under Options to change connection priority.
- Changing Wi-Fi Networks Priority: Prioritize Wi-Fi networks based on speed and stability. Use Advanced settings to reorder available Wi-Fi networks and uncheck Auto-Join for networks not in use.
Renewing the DHCP Lease:
If your Mac is using a dynamic IP address assigned by a DHCP server, you may need to manually renew the lease in certain cases.
- Manually Renewing a DHCP Lease: Access network preferences, select the network connection, go to the TCP/IP tab, and click Renew DHCP Lease to manually renew the lease.
Conclusion:
By following these essential network troubleshooting tips on macOS, you can resolve connectivity issues, optimize your Wi-Fi performance, and enjoy a seamless online experience. Remember to use the Wireless Diagnostics app and prioritize network connections to ensure stable and reliable internet connectivity on your Mac.