Introduction: Wi-Fi Adapter Problems
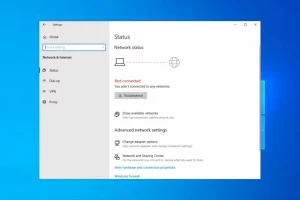
When the Wi-Fi adapter is not working in Windows 10, you may find yourself limited to a wired connection unless you take action. Many users have reported wireless connection issues, especially after a Windows update. In most cases, updating drivers or modifying settings can resolve the problem.
Why is my Wi-Fi adapter not working?
There are several common reasons for Wi-Fi adapter issues:
- Malfunctioning drivers: Especially after an OS update, you may encounter problems with drivers that are not working correctly. Updating the drivers usually solves the issue.
- Improper settings: Sometimes, adapter settings may change without warning, affecting its functionality.
- The adapter is damaged: Though highly unlikely, if the problem coincides with a drop of your laptop, the Wi-Fi adapter might be damaged.
Common Wi-Fi Adapter Issues in Windows 10:
Users have reported various Wi-Fi adapter issues after a Windows update. Some of these include:
- Windows 10 Wi-Fi adapter missing, not showing, not working: If your computer fails to recognize the adapter, you won’t see it in Device Manager.
- My Windows 10 Wi-Fi disconnects frequently: If your connection is unstable, there are solutions to fix that too.
- Windows 10 has no Wi-Fi option in settings: Just as with the taskbar, the Wi-Fi option may disappear from the Settings page.
- Windows 10 Wi-Fi connected but no Internet: This is the worst scenario – when everything seems right, but you can’t connect to the Internet. Rest assured, there are solutions for this too.
- Realtek Wi-Fi adapter not working: It is possible that your Wi-Fi adapter’s failure is due to its driver being recently removed.
- The Wi-Fi adapter stopped working: On certain laptops, Wi-Fi may be turned on and off using either a dedicated hardware button or a set of keys on the keyboard.
- No Wi-Fi adapters available Cisco AnyConnect: In the NAM section of the Anyconnect client, the message “No network adapters” appears.
- No Wi-Fi adapters available in Windows 11: Start the Network Adapter troubleshooter on your Windows PC if you can’t find your Wi-Fi adapter on that machine.
- Wi-Fi adapter not showing in Device Manager: If the wireless adapter still does not appear in Device Manager, you may use the System Restore point to roll back to a previous functional state.
How to Fix Wi-Fi Adapter Issues on Windows 10:
- Update the network drivers (Internet needed):
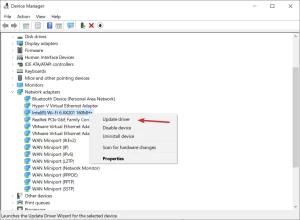
- Right-click the Start button and select Device Manager.

Image by https://windowsreport.com/ - Click on the Network adapters section, locate the Wi-Fi adapter, right-click on it, and select Update driver.

Image by https://windowsreport.com/ - Select “Search automatically for drivers.”
- If the system finds a new driver, it will be installed, and you will be prompted for a restart.

Image by https://windowsreport.com/


-
Use the built-in troubleshooter:
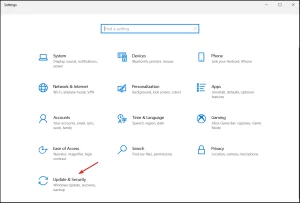
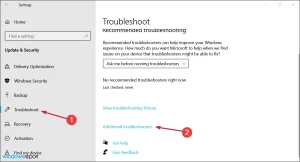
- Press the Windows key + I to open Settings, then head to Updates & Security.

Image by https://windowsreport.com/ - Select Troubleshoot from the left pane and click on Additional troubleshooters.

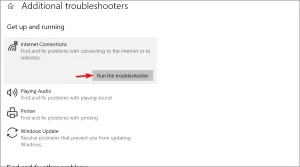
Image by https://windowsreport.com/ - Choose Internet Connections and click the Run the troubleshooter button.

Image by https://windowsreport.com/ - Follow further on-screen instructions and let the process finish.
- Restart your computer.
-
Reset network adapters:
- Right-click on the Start button and choose Windows PowerShell (Admin).

Image by https://windowsreport.com/ - Type or paste the following lines into Windows Powershell and press Enter after each one:
- netsh winsock reset
- netsh int ip reset
- ipconfig /release
- ipconfig /renew
- Once done, restart the computer and verify whether the Wi-Fi adapter is still not working.

-
Perform a registry tweak with Command Prompt:
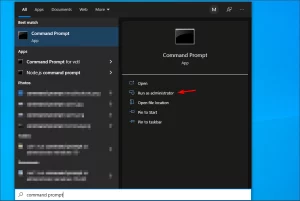
- Type Command Prompt in the search bar and click on Run as administrator.

Image by https://windowsreport.com/ - Paste the following line and press Enter: netcfg –s n
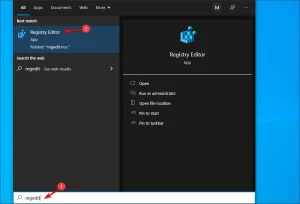
First, go to Search, type regedit, and open the Registry Editor.
Image by https://windowsreport.com/ Navigate to the following path:
Image by https://windowsreport.com/
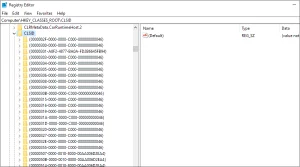
Note: If the command returns the error 0x80004002, follow the additional steps mentioned in the article.
-
Change the adapter settings:
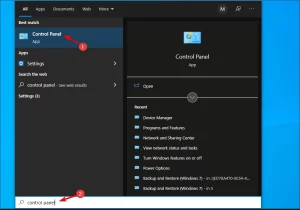
- Click on the Start button, type Control Panel, and then click on the relevant search result.

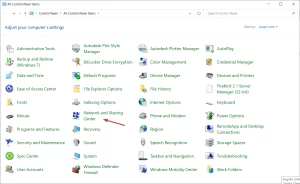
Image by https://windowsreport.com/ Go to the top right corner and change the View by option to Large icons.

Image by https://windowsreport.com/ - Select Network and Sharing Center.

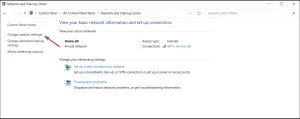
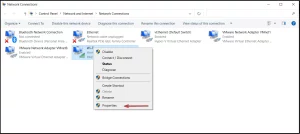
Image by https://windowsreport.com/ - Click on Change adapter settings.

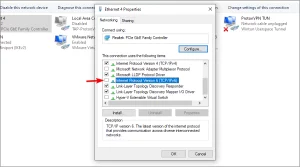
Image by https://windowsreport.com/ - Right-click the wireless adapter and select Properties.

Image by https://windowsreport.com/ - Search for Internet Protocol Version 6 (TCP/IPv6), and uncheck the option to disable it.

Image by https://windowsreport.com/ - Click on OK and restart the computer to enforce the changes.
-
Reinstall the network adapter:
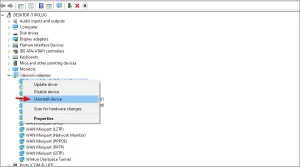
- Right-click the Start button and choose Device Manager from the list.

Image by https://windowsreport.com/ - Click on the Network adapters section to expand it.
- Right-click your network adapter and select Uninstall device.

Image by https://windowsreport.com/ - Follow further on-screen instructions.
- Restart your computer, and Windows will automatically install the best available drivers for the device.

-
Reset your router:
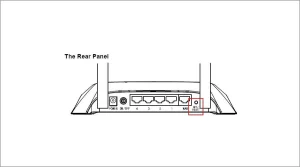
- Locate the Reset button at the back of the router.
Image by https://windowsreport.com/ - Press and hold it for more than 10 seconds until the SYS LED starts flashing quickly, and release the button.
-
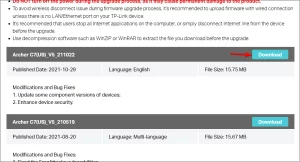
Update the router firmware:
- Use an Ethernet cable to connect the router to your PC.
- Visit your router’s manufacturer’s website.
- Locate your model on the list.
- Download the latest firmware version for your model.

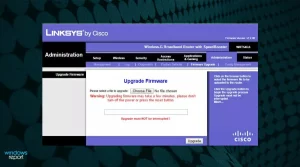
Image by https://windowsreport.com/ - Open your web browser and type the IP address or the router’s link (e.g., 192.168.0.1, but yours may be different).
- Enter the username and password provided by the manufacturer or the ones you set.
- Navigate to the Firmware section and find the Choose file or Browse button to let you add the downloaded firmware.
Image by https://windowsreport.com/ - Wait for the process to finish, and do not interrupt it at any cost.
-
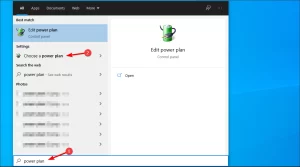
Switch to the Maximum Performance mode:
- Press the Windows key + S and enter power plan. Now click on Choose a power plan.

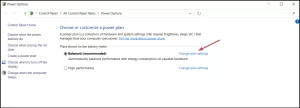
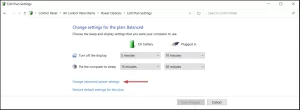
Image by https://windowsreport.com/ - Once the Power Options window opens, locate your current plan and click Change plan settings.

Image by https://windowsreport.com/ - Go to Change advanced power settings.

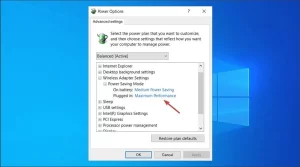
Image by https://windowsreport.com/ - Expand Wireless Adapter Settings, and set the Power Saving Mode to Maximum Performance.
Image by https://windowsreport.com/ - Click Apply and OK to save the changes.
Troubleshooting Wi-Fi Adapter Problems on Windows 11:
To troubleshoot Wi-Fi adapter problems on Windows 11, follow these steps:
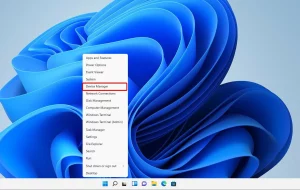
- Press the Windows key + X and select Device Manager from the list.
- Locate your wireless adapter from the list and double-click it to open its Properties.
- Navigate to the Power Management tab and disable the “Allow the computer to turn off this device to save power” option.
- Click OK to save the changes.
Expert Tips to Avoid Wi-Fi Connection Problems:
- Choose a less crowded channel: Open your router’s configuration page, navigate to the Wireless section, and select your network. Choose a different channel for it.
- Move between 2.4 GHz and 5 GHz: If you have a dual-band router, switching between the two frequencies can be a good idea.
- Remove unwanted devices: Ensure you have not given the router password to any unauthorized users, and delete the devices you don’t recognize from your router’s settings.
- Upgrade your device (change the Wi-Fi card): If your current Wi-Fi adapter is not working correctly, consider using a new Wi-Fi adapter that fits your needs better.
- Get the right router for your needs: Choose a router that provides signal coverage throughout your home. If the connection fails from time to time, it might be a problem with the router itself or the signal power to your device.
- Keep your drivers updated: Regularly update the network drivers to prevent Wi-Fi adapter issues.
- Pick the correct Wi-Fi hotspot: Ensure you are connected to the correct network, as sometimes devices can mistakenly connect to slower or more crowded ones.
Conclusion:
Wi-Fi adapter issues in Windows 10 can be frustrating, but with the right troubleshooting steps and solutions, you can get your Wi-Fi back up and running. By updating drivers, using the built-in troubleshooter, resetting network adapters, performing registry tweaks, changing adapter settings, reinstalling the network adapter, and updating router firmware, you can overcome various Wi-Fi adapter problems. Additionally, following expert tips and choosing the right frequency and router can help you avoid Wi-Fi connection problems in the future. With these fixes and solutions, you can enjoy seamless internet connectivity on your Windows 10 PC.